下载Hbase
这里选择的是 v3.0.0-bin.tar.gz
下载之后解压到 /usr/local/hbase
在 路径 /usr/local/hbase/conf/ 下配置 hbase-site.xml
<?xml version="1.0"?>
<?xml-stylesheet type="text/xsl" href="configuration.xsl"?>

<configuration>
  <property>
    <name>hbase.rootdir</name>
    <value>hdfs://localhost:9000/hbase</value>
  </property>
  <property>
    <name>hbase.cluster.distributed</name>
    <value>true</value>
  </property>
  <property>
    <name>hbase.unsafe.stream.capability.enforce</name>
    <value>false</value>
  </property>
  <property>
    <name>hbase.wal.provider</name>
    <value>filesystem</value>
  </property>
</configuration>在 路径 /usr/local/hbase/conf/ 下配置 hbase-env.sh
export JAVA_HOME=/usr/lib/jvm/java-17-openjdk-amd64
export HBASE_CLASSPATH=/usr/local/hbase/conf
export HBASE_MANAGES_ZK=true可在终端使用 hbase shell 进入 hbase 终端 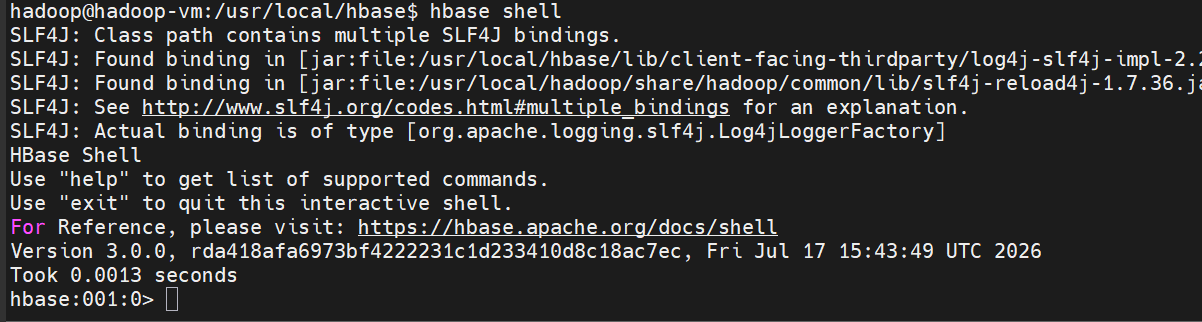
Hbase 查询表
使用命令:list 查询全部表
hbase:001:0> list
TABLE
0 row(s)
Took 0.8245 seconds
=> []Hbase create 创建表
使用命令: create 'teble_name', 'table_column1', ... 可使用: help 'create' 查看关于 create 命令的详细使用方法,如下:
hbase:002:0> help 'create'
Creates a table. Pass a table name, and a set of column family
specifications (at least one), and, optionally, table configuration.
Column specification can be a simple string (name), or a dictionary
(dictionaries are described below in main help output), necessarily
including NAME attribute.
Examples:

Create a table with namespace=ns1 and table qualifier=t1
  hbase> create 'ns1:t1', {NAME => 'f1', VERSIONS => 5}

Create a table with namespace=default and table qualifier=t1
  hbase> create 't1', {NAME => 'f1'}, {NAME => 'f2'}, {NAME => 'f3'}
  hbase> # The above in shorthand would be the following:
  hbase> create 't1', 'f1', 'f2', 'f3'
  hbase> create 't1', {NAME => 'f1', VERSIONS => 1, TTL => 2592000, BLOCKCACHE => true}
  hbase> create 't1', {NAME => 'f1', CONFIGURATION => {'hbase.hstore.blockingStoreFiles' => '10'}}
  hbase> create 't1', {NAME => 'f1', IS_MOB => true, MOB_THRESHOLD => 1000000, MOB_COMPACT_PARTITION_POLICY => 'weekly'}

Table configuration options can be put at the end.
Examples:

  hbase> create 'ns1:t1', 'f1', SPLITS => ['10', '20', '30', '40']
  hbase> create 't1', 'f1', SPLITS => ['10', '20', '30', '40']
  hbase> create 't1', 'f1', SPLITS_FILE => 'splits.txt'
  hbase> create 't1', {NAME => 'f1', VERSIONS => 5}, METADATA => { 'mykey' => 'myvalue' }
  hbase> # Optionally pre-split the table into NUMREGIONS, using
  hbase> # SPLITALGO ("HexStringSplit", "UniformSplit" or classname)
  hbase> create 't1', 'f1', {NUMREGIONS => 15, SPLITALGO => 'HexStringSplit'}
  hbase> create 't1', 'f1', {NUMREGIONS => 15, SPLITALGO => 'HexStringSplit', REGION_REPLICATION => 2, CONFIGURATION => {'hbase.hregion.scan.loadColumnFamiliesOnDemand' => 'true'}}
  hbase> create 't1', 'f1', {SPLIT_ENABLED => false, MERGE_ENABLED => false}
  hbase> create 't1', {NAME => 'f1', DFS_REPLICATION => 1}

You can also keep around a reference to the created table:

  hbase> t1 = create 't1', 'f1'

Which gives you a reference to the table named 't1', on which you can then
call methods.这里使用 create 't1', {NAME => 'f1', VERSIONS => 1} 方式创建
t1: 创建的表名{NAME => 'f1', VERSIONS => 1}:NAME: 表中的 一个命名为f1的列VERSIONS: 这个数据在表中能存多少份,默认是 1
例如 创建语句使用
create 'teachers', {NAME => 't_name', VERSIONS => 3}结果如下
hbase:009:0> create 'teachers', {NAME => 't_name', VERSIONS => 3}
Created table teachers
Took 1.2230 seconds
=> Hbase::Table - teachers
hbase:010:0> list
TABLE
teachers
1 row(s)
Took 0.0071 seconds
=> ["teachers"]Hbase put 插入数据
通过 help 'put'查看命令用法,一次只能插入一个值
hbase:011:0> help 'put'
Put a cell 'value' at specified table/row/column and optionally
timestamp coordinates.  To put a cell value into table 'ns1:t1' or 't1'
at row 'r1' under column 'c1' marked with the time 'ts1', do:

  hbase> put 'ns1:t1', 'r1', 'c1', 'value'
  hbase> put 't1', 'r1', 'c1', 'value'
  hbase> put 't1', 'r1', 'c1', 'value', ts1
  hbase> put 't1', 'r1', 'c1', 'value', {ATTRIBUTES=>{'mykey'=>'myvalue'}}
  hbase> put 't1', 'r1', 'c1', 'value', ts1, {ATTRIBUTES=>{'mykey'=>'myvalue'}}
  hbase> put 't1', 'r1', 'c1', 'value', ts1, {VISIBILITY=>'PRIVATE|SECRET'}

The same commands also can be run on a table reference. Suppose you had a reference
t to table 't1', the corresponding command would be:

hbase> t.put 'r1', 'c1', 'value', ts1, {ATTRIBUTES=>{'mykey'=>'myvalue'}}使用 put 't1', 'r1', 'c1', 'value'
t1: 要插入的表名r1: 要插入的表的行的key,自定义的c1: 要插入的表对应的列名value: 要插入的值
put 'teachers', 't001', 't_name', 'zhangsan1'
put 'teachers', 't001', 't_name', 'zhangsan2'
put 'teachers', 't001', 't_name', 'zhangsan3'结果:
hbase:012:0> put 'teachers', 't001', 't_name', 'zhangsan1'
Took 0.1377 seconds
hbase:013:0> put 'teachers', 't001', 't_name', 'zhangsan2'
Took 0.0080 seconds
hbase:014:0> put 'teachers', 't001', 't_name', 'zhangsan3'
Took 0.0074 secondsHbase get 查看数据
更多使用方法,查看 help 'get' 这里使用 get 't1', 'f1', {COLUMN=> 'c1', VERSIONS=> 3}
t1: 要查找的表名,必填r1: 要查找的表的行的key,必填c1: 要查找的表对应的列名,VERSIONS: 要展示的最近的数据条数
hbase:017:0> get 'teachers', 't001', {COLUMN=> 't_name', VERSIONS=> 3}
COLUMN  CELL
 t_name: timestamp=2026-11-10T18:00:12.940, value=zhangsan3
 t_name: timestamp=2026-11-10T18:00:09.945, value=zhangsan2
 t_name: timestamp=2026-11-10T18:00:07.247, value=zhangsan1
1 row(s)
Took 0.0136 secondsHbase 数据覆盖(更新数据)
通过 put 可以将最先插入的数据给覆盖,和创建表时设置的VERSIONS值进行控制
通过上面的插入数据和查询数据可以得到,当前数据表teachers, t001对应的数据条数是有三条,如下:
hbase:019:0> get 'teachers', 't001', {COLUMN=> 't_name', VERSIONS=> 4}
COLUMN  CELL
 t_name: timestamp=2026-11-10T18:00:12.940, value=zhangsan3
 t_name: timestamp=2026-11-10T18:00:09.945, value=zhangsan2
 t_name: timestamp=2026-11-10T18:00:07.247, value=zhangsan1
1 row(s)
Took 0.0418 seconds再次执行 put 'teachers', 't001', 't_name', 'zhangsan4' 时,并查询结果,如下:
hbase:020:0> put 'teachers', 't001', 't_name', 'zhangsan4'
Took 0.0109 seconds
hbase:021:0> get 'teachers', 't001', {COLUMN=> 't_name', VERSIONS=> 4}
COLUMN  CELL
 t_name: timestamp=2026-11-10T18:08:57.700, value=zhangsan4
 t_name: timestamp=2026-11-10T18:00:12.940, value=zhangsan3
 t_name: timestamp=2026-11-10T18:00:09.945, value=zhangsan2
1 row(s)
Took 0.0108 seconds初始的 t_name: timestamp=2026-11-10T18:00:07.247, value=zhangsan1 被替换
Hbase delete,deleteall 删除数据
通过 delete 删除指定列族的数据,族 t_name: 如果使用t_name 表示只删除这个列族中时间戳恰好等于删除时间的版本。省略时间戳时,HBase 使用服务器当前时间,会和之前数据插入的时间戳不对应,导致删除的数据为空,再次查询依旧可以看到
delete 'teachers', 't001', 't_name:'

# 查看删除后的数据列表
get 'teachers', 't001', {COLUMN => 't_name:', VERSIONS => 3}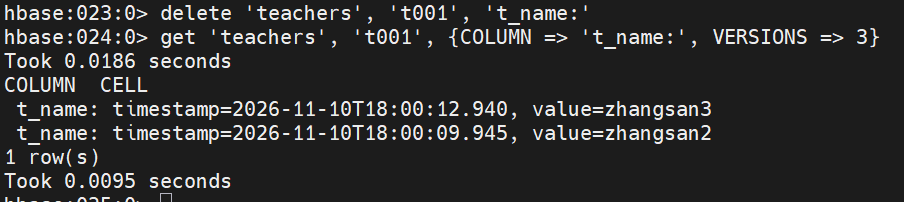 删除全部列 使用
deleteall
deleteall 'teachers', 't001'
get 'teachers', 't001'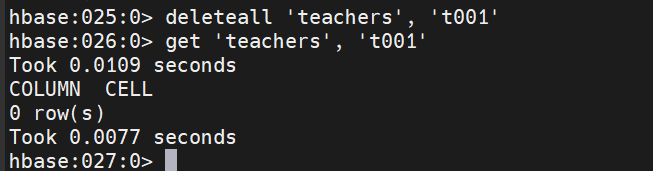
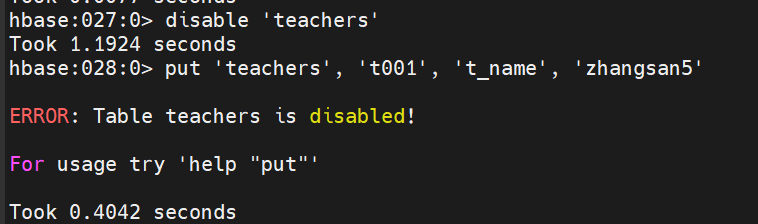
Hbase disable 停用表
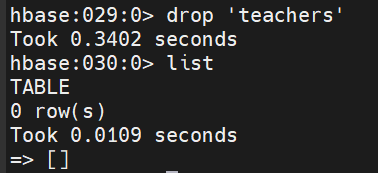
Hbase drop 删除表